Learnt how to make a container and how to make a new image to start a container you modified with all the required applications to run the software you were intending to.
Now need to store these images in a place that can be managed easily and by more than just yourself. Have two options at this point, Public or Private cloud based which is provided via Docker Hub. The second option is a private locally based repository, this is a good option when the containers can’t see the internet like during the development process.
Docker Hub, need to setup a Repo first and ensure you remember the repo name as its required when you push the image to the hub. The image also needs to have the same repository name as what was created on Docker Hub. If you’ve already created an image and then you need to rename it to make sure everything matches.
1
docker tag <username>\<dockerhub repository name>
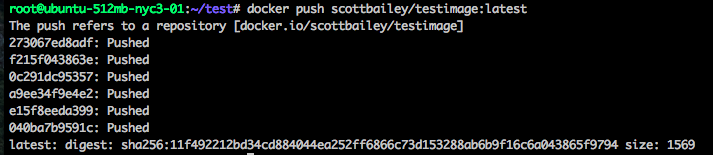
now you will be okay to push the image to Docker Hub.
now that it’s on Docker Hub you can then do the following command to use this image.
1
docker pull <username>\<reponame on dockerhub>
As the image is already up to date it doesn’t need to complete a pull.
The second option is to build your own private registry and repository. The simplest option for this is by buying into the Docker Enterprise solution as that will allow you to have a simple setup similar to the Docker Hub web interface.
The next option that can be used is by setting up a registry inside a container that you interact with privately. You can see the container image here.
1
docker run -p 5000:5000 -v <HOST_DIR>:/tmp/registry-dev registry
Now to push to your private registry you will need to tag all images with the host IP or host name and port of the registry container. In the example I’m using theregistry in place of the actual details
1
docker tag <image id> theregistry:5000/scottimage:1.0
Then you can do the push
1
docker push theregistry:5000/scottimage:1.0
Then now the local users can all do a pull for this image without having to download from the internet.
1
docker pull theregistry:5000/scottimage:1.0
Before a remote pull is initiated from another docker environments you will need to complete a TLS setup on the network. This is something that I will need to look at further, but the work around is by modifying the start up file for docker on any host needing to connect to the local repository.
1
/etc/default/docker
VOLUMES, Docker has a handy feature that lets you connect containers to persistent data sources, for writing logs so they can be viewed whilst the container is offline or if you want more than one container to see the same set of data.
1
docker run -d -P -v /<volumename> scottbailey/testimage:1.0
This can also be set in the Dockerfile so it’s apart of the as built container.
1
VOLUME /<volumename>
This will be useful if you want to map the applications logs to the host so you can see what happens with the container stops as volumes retain the data that is being written to them. To this is when starting a container like so:
1
docker run -d -P -v /nginxlogs:/var/log/nginx nginx
You can have more than one volume assigned to a container.
Networking its a key function that needs to be given plenty of thought when working in containers as the containers have their own network inside the container and you need to make this accessible via its hosts network. We’ve seen this example earlier when running the nginx webserver.
1
docker run -d -p 8080:80 <container name> nginx
This maps port 80 of the nginx container to port 8080 on the host.
If you want docker to handle the port forwarding for you that can be done by using -P To do this as part of the Dockerfile that is done via the line EXPOSE 80 443.
They also allow you to have private network setup between running containers via –link (need to use container names for this function though)
1
docker run -d --name dbms mysql
TID BITS for troubleshooting Docker. The Docker service has its own logging for the service itself, this has to be set on startup.
1
service docker stop
then set the logging on start -
1
docker -d --logs-level=debug & (& is so you get the entries to your terminal window / runs in the background)
1
kill $(pidof docker) {This kills all PID's associated to the Docker service and its debugging}
There are 5 levels debug, info, warn, error and fatal. The logs are written to /var/log/upstart/docker.log
So in the first part we learnt what Docker was and what Docker can do. Now we need to learn how to be able to manage the containers so that we have control over them and so we have an easy way to deploy them into different environments.
This is all done via the concept of Images, and commits like how you manage your source control with Git. Once you’ve added the required changes to your application, be it that you needed to update the ubuntu VM with the text editor that you like to use when you’re trawling through the logs, or have to deploy a new piece of application.
To do this:
1
docker run -it ubuntu bash
When in the containter’ed ubuntu can see that vim isn’t installed, so a simple apt-get fixes this. So next time you wont want to have to do that again.
With docker images you can now see your new image to run next time, to run your newly updated ubuntu image the command is:
1
docker run -it scottvim:1.1 bash
With how simple it is to manage and update its little wonder why this is taking off as the continuous integration platform.
Docker also has the functionality of making this into text files called Dockerfiles so you can submit these into source repositories and see commited change history. Also saves time from having to spin up a new container to make changes.
With Dockerfiles you need to ensure you combine the commands as much as possible as each executed command makes a new commit of that image. The example of how to combine more than one command.
1
2
3
4
FROM ubuntu
RUN apt-get update && apt-get install -y \
	vim \
	nginx
This will update the ubuntu container as well as install vim and nginx as one commit, allowing less commits and wasted time.
Now you’ve got the Dockerfile it once again needs to be built, this is done lock so.
1
docker build -t scott/<imagename>:<tag>(normally version number) <context path>(web project)
the context path is the location in which Docker will collect files from if you’ve linked source files that are required for the applications to run.
Then you can just start it like you had been before.
1
docker run <nameofimage>:<tag>
Easy as that.
So been playing around with creating lots of containers whilst making all the images to remove all the containers that we don’t need any more the command is
New technologies fascinate me, the one that has me fascinated at the moment is Docker a new type of virtual environment solution, or so I thought before starting my journey. I quickly learnt it could be so much more than that.
So to get started I had found Docker’s own e-courses. Self Paced - Free.
What I’ve learnt so far: Instead of having to have server with a hypervisor loaded onto like VMWare or alike, it can just run on a base image of a Linux Distro - which can be hosted on a VMWare instance, or run off a cheap VPS. It also is going to come pre-installed on Windows Server 2016… that pretty mind blowing. Microsoft accept more and more open source.
To install Docker it’s as simple as running a wget and piping that to a shell script… CRAZY.
1
wget https://get.docker.com/ | sh
Once it’s installed you should look at the basics of what it can do. For my system I’ve got a Ubuntu VM running on a VPS, this is so I don’t have to run it on my local machine. So can do normal VM stuff on this VM it took probs 15 minutes to setup the VM. With this simple command I install a new Ubuntu image onto of the current Ubuntu and run a simple bash shell….
1
docker run -it ubuntu bash
Now you have a vm inside a Docker container running bash… and it took seconds to run! seconds!!!
When you finished with the command it kills the instance of the command so it runs for only the time you need it and only consumes the resources to just execute what you wanted to do. To make the application run for a set period of time or until you’re done with it you need the flags - -d (detached mode - so you can (run in background)) -P (port forwarding, maps containers required ports to the host ports)
All the containers are setup easily and simple by running containers that you can simple pull down from Dockers Hub. Docker Hub. All images can be edited and set up to be pulled from the public repository or your own private repository. The have images that are just containers that have a single application installed on them, i.e Java, Nginx. They have containers that have more than a single application on them i.e Ubuntu or Centos. The options for this is endless or that’s the feeling I’m getting just from this brief experience with them.
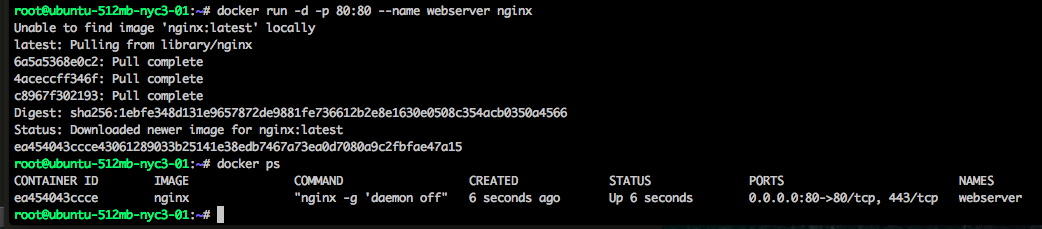
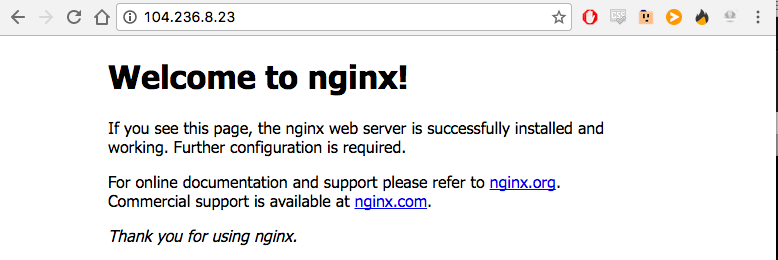
Now you’re like what can I do with Docker? easy want to run up a simple webserver is seconds and its just hosted of a simple VM and you don’t need worry about the settings files and which ports you need: Run this -
1
docker run -d -p 80:80 --name webserver nginx
To check on what docker is currently running
1
docker ps
Now you can also see from that the ports that are forwarded to your host to make the containtered process / application work from the web:
Once you have finished with it you will need the dockers Container ID and run
1
docker stop <container id>
(the id can be found from the docker ps command)
Want to see what containers you have run? simple
1
docker ps -a
Well these are all the basic things I’ve found out about Docker and its fascinating me so much I will be continuing this as a series on this weekend.
Next step is working out how to make own images that will be easily deployable and understand what needs to go into the images that I pulled off Dockers Hub.
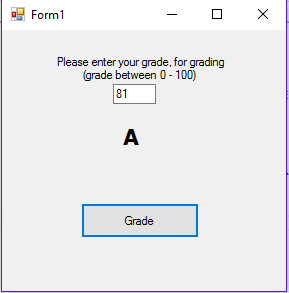
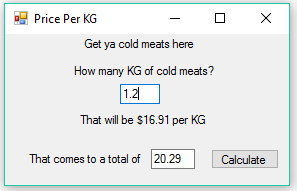
Keeping things simple with a couple easy Windows Form Applications, so once I got past the first problem in - the last post of working out how to get the text box strings to integers so I could do the sum on them, it all flew together for these basic math problems.
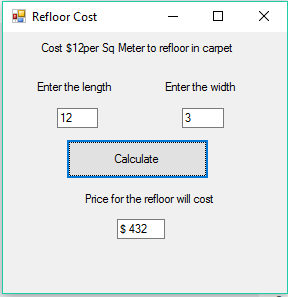
Here is a list of problems I was working off.
A delicatessen sells cold cuts by the pound. Write a program which calculates the customer’s bill after accepting the pounds purchased and price per pound.
Find the cost of broadloom given the length and width of a room in metres. The cost of the broadloom is $12 per square metres.
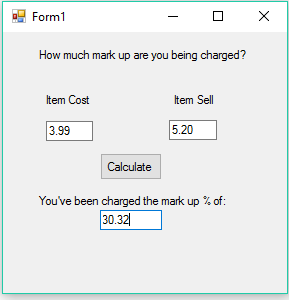
Write a program to calculate the percentage markup for any store item, given the cost and the selling price.
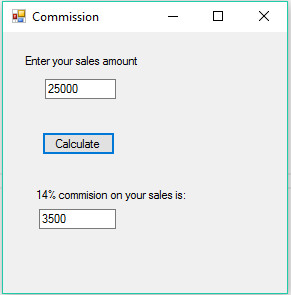
Write a program which accepts a salespersons sales for one week and then determines the commission. Commission is 14% of sales.
This one I want to revisit and find away so the user can enter how much commission they should be claiming from their sales. Currently I’m not sure how to work that bit out, as the user will enter a % in an integer instead of a decimal number so for 14% commission the math needs to make that number 0.14%. Will come back and look at this at a later date.