Learnt how to make a container and how to make a new image to start a container you modified with all the required applications to run the software you were intending to.
Now need to store these images in a place that can be managed easily and by more than just yourself. Have two options at this point, Public or Private cloud based which is provided via Docker Hub. The second option is a private locally based repository, this is a good option when the containers can’t see the internet like during the development process.
Docker Hub, need to setup a Repo first and ensure you remember the repo name as its required when you push the image to the hub. The image also needs to have the same repository name as what was created on Docker Hub. If you’ve already created an image and then you need to rename it to make sure everything matches.
1 | docker tag <username>\<dockerhub repository name> |
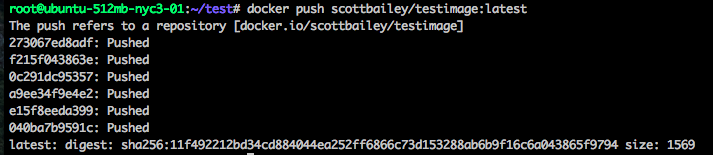
now you will be okay to push the image to Docker Hub.
1 | docker push <username>\<dockerhub repository name> |
now that it’s on Docker Hub you can then do the following command to use this image.1
docker pull <username>\<reponame on dockerhub>

As the image is already up to date it doesn’t need to complete a pull.
The second option is to build your own private registry and repository.
The simplest option for this is by buying into the Docker Enterprise solution as that will allow you to have a simple setup similar to the Docker Hub web interface.
The next option that can be used is by setting up a registry inside a container that you interact with privately. You can see the container image here.1
docker run -p 5000:5000 -v <HOST_DIR>:/tmp/registry-dev registry
Now to push to your private registry you will need to tag all images with the host IP or host name and port of the registry container. In the example I’m using theregistry in place of the actual details1
docker tag <image id> theregistry:5000/scottimage:1.0
Then you can do the push1
docker push theregistry:5000/scottimage:1.0
Then now the local users can all do a pull for this image without having to download from the internet.1
docker pull theregistry:5000/scottimage:1.0
Before a remote pull is initiated from another docker environments you will need to complete a TLS setup on the network.
This is something that I will need to look at further, but the work around is by modifying the start up file for docker on any host needing to connect to the local repository.1
/etc/default/docker

VOLUMES, Docker has a handy feature that lets you connect containers to persistent data sources, for writing logs so they can be viewed whilst the container is offline or if you want more than one container to see the same set of data.
1 | docker run -d -P -v /<volumename> scottbailey/testimage:1.0 |
This can also be set in the Dockerfile so it’s apart of the as built container.1
VOLUME /<volumename>
This will be useful if you want to map the applications logs to the host so you can see what happens with the container stops as volumes retain the data that is being written to them.
To this is when starting a container like so:1
docker run -d -P -v /nginxlogs:/var/log/nginx nginx
You can have more than one volume assigned to a container.
Networking its a key function that needs to be given plenty of thought when working in containers as the containers have their own network inside the container and you need to make this accessible via its hosts network. We’ve seen this example earlier when running the nginx webserver.1
docker run -d -p 8080:80 <container name> nginx
This maps port 80 of the nginx container to port 8080 on the host.
If you want docker to handle the port forwarding for you that can be done by using -P
To do this as part of the Dockerfile that is done via the line EXPOSE 80 443.
They also allow you to have private network setup between running containers via –link (need to use container names for this function though)1
docker run -d --name dbms mysql
TID BITS for troubleshooting Docker.
The Docker service has its own logging for the service itself, this has to be set on startup.1
service docker stop
then set the logging on start -1
docker -d --logs-level=debug & (& is so you get the entries to your terminal window / runs in the background)
1 | kill $(pidof docker) {This kills all PID's associated to the Docker service and its debugging} |
There are 5 levels debug, info, warn, error and fatal. The logs are written to /var/log/upstart/docker.log